I think her first idea was swing dancing. Not a chance! We were both athletes once (a long, long time ago) but dancing was never a strength for either of us. The next idea was golf. That one never got off the ground either. Finally she signed us up for stained glass class. We just recently completed the six week course and I have to say, it was time well spent for both of us.


First, I took a photo of the item to be immortalized in glass. I set the plane on a pine board that was propped up on my workbench. I actually took several photos, but this one appealed to me the most.

Using a typical ink-jet printer, enlarged the photo and printed it out (in black and white) in sections on six 8.5" x 11" pages. I then cut out and taped the pages together to create what you see in the photo above.
The next step was the tricky part. I had to decide where to divide the image so that it would make sense as a stained glass panel. I began tracing around the obvious parts, like the handles and the metal base. I decided that some of the larger pieces should be "broken" into smaller ones. (Remember, I have no stained glass experience at this point, so what do I know!?) You can see some of those lines in the photo.
I then put carbon paper onto poster board and placed the photograph on top of the carbon paper. I traced the lines I made earlier and the carbon paper transferred them to the poster board. Once the outlines were clear on the poster board I used copper foil scissors and cut out all the different pieces. These individual pieces are the templates I used to cut the glass.
We were taught to paste the poster board cut-outs to the glass and then run our glass cutters along that template. Once the "scratch" was made onto the glass, there are special pliers we used to break the glass apart. A glass grinder finished each piece.
The rest of the project was copper foiling, assembling, soldering and applying patina. There is a lot of work in a stained glass project! I'll show you some of these steps in more detail in a later post.
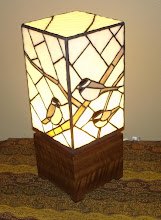
In the end I think it worked well. Some of the glass parts were difficult to make, but not impossible. It was definitely a challenging project but I would do it again the same way.

No comments:
Post a Comment