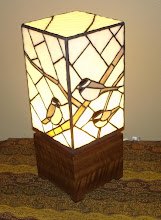
The next step is to transfer the four pencil-drawn panel images to heavier paper so that they can be cut.

The cut out pieces of each panel will be used as a template to mark the glass for cutting. I used common carbon paper, a pencil and my trusty ruler to make the transfer. Some poster board left over from one of my sons' school projects was used as the backing paper. It is stiff and durable; two great qualities for a template.
Transferring all four images at once to a single sheet of the poster board was done for the sake of convenience. Drawing and transferring images includes a different set of tools. I'll put the drawing stuff away as soon as it's done.
I don't like working with carbon paper because it can be messy. There was a small amount of excess carbon that rubbed off onto the poster board. The extra carbon may have made the templates a little messier than necessary but it didn't really interfere with the project.

In the image above you can see the poster board has several individual pieces already cut. I used copper foil shears for this job. The shears don't merely cut like regular scissors, they actually remove a sliver of paper in between the pieces. This additional space makes room for the copper foil that will eventually surround each piece of glass.
Notice that each piece is already labeled. Did you see that each template has a directional arrow? The arrow signifies the eventual orientation of the glass. Most of the art glass I use has a pattern that flows in a certain direction. I want the streaks in the glass to flow in the proper direction in my panel. The arrows on individual template pieces remind me which direction they are supposed to go.

Now you can see my glass cutting board is getting busy. The template for this first panel has been cut out completely and I'm beginning to mark and cut glass. I place the paper template on the the glass and outline it with an oil-based marker. I then remove the template and cut just inside the marker line. My running pliers (lower left in photo) usually takes care of the breaking.


Organization is really important. (So is safety. Wear your safety glasses!) Some of these paper templates are small (smaller than I like). I place the templates in order on the board before they are cut. After they are cut they go into a little plastic baggie for safekeeping. Each baggie has its project name and panel number written on it. Save your templates and drawings! You can use them over and over. You never know when someone will want you to make them their own version of your project.

I placed my original drawing to the side of the work board. Here I can organize the glass pieces as I complete them. I can also compare the glass shape and size to make sure the fit is correct. Notice the grain direction in the glass of the bird's wing. That part of the bird would have looked funny with the streaks running in a different direction.

Now you can see my project board with the glass cut and in place. The yardsticks allow me to contain the pieces within the finished size of the panel. I will not move these sticks until all four panels are constructed.
The project board is simply a piece of 3/4" birch plywood. I've squared-up and nailed some scrap lumber at one corner. Making sure your project is square is really important. It is especially important when you have four panels that need to solder together later.

As I begin to copper foil each piece, I find that the fit is getting tighter and tighter. Some pieces need additional grinding for a proper fit. If I take away too much it will make gaps between the pieces which are harder to cover in solder.